
Thinking about making the drive from Santiago to Mendoza? Read on for tips on crossing the border and making the most of the breathtaking drive over the Andes mountains.
After nearly 2 months living in Chile, we decided it was time to make our first international road trip here in South America. The Easter holidays (Semana Santa or Holy Week) here are celebrated beginning on Thursday, which meant 2 days off of work. I took an extra vacation day on Monday, and we booked a room in a boutique hotel outside of Mendoza, Argentina for the long weekend.
With the accommodations booked, it was time to figure out the logistics of crossing the border. The drive itself is just shy of 5 hours, taking you across the Andes mountains, but we had heard some horror stories of multi-hour waits at customs and of people being turned around because they didn’t have the right paperwork. Though we did find a few helpful blogs in English that outline the process, this information wasn’t in abundance, so I wanted to share our experience for anyone who might be planning to make this trip in the future. For the record, despite the hassle of customs, I highly recommend the drive.
Tips for a great trip from Chile to Argentina and back:
Bring the right paperwork
In order to make the trip, there are a few documents you need to make sure you have with you:
- Passports
- International Insurance (purchase online at mapfre.cl – select “Viajes” and then “Seguro Obligatorio Argentina – RC Internacional”)
- Proof of car ownership, or letter of permission to bring car into Argentina
- Exit from issued at Argentina customs (make sure to keep this in a safe place during your stay, as you will need it to re-enter Chile
Download a map
Unless you will have phone service in Argentina, make sure you download a map or get a GPS ahead of time. One great app that we were tipped off too since arriving here is MapMe. It allows you to download maps onto your phone ahead of time, and use GPS even without a cellular connection. It served us well throughout our trip, and I would recommend it to anyone as a free alternative to renting a GPS or purchasing maps to load onto your current device.
Leave early and travel on non-peak days
We heard from co-workers that most people here tend to travel later in the day, so you can really benefit from getting out of bed and on the road early. We headed out from our apartment around 6:30 AM on Friday morning, and experienced very little traffic for the first couple hours of our trip. We also decided to take Monday off, and thus avoid traveling home on the last day of the Easter holiday. Our tour guide in Mendoza told us that this was a great decision, as over 30,000 people were going to be going through the border Saturday and Sunday, and waits were projected to be multiple hours long. Obviously, it’s not always possible, but to the extent you can, traveling early and during the week will make your trip smoother.

6:30 AM – Trying to be morning people to beat the rush to the Argentina border.
Stay Alert
After exiting Chile, there is a stretch of 20-30km before you actually enter customs in Argentina. We were cruising along, and while it seemed like we had driven quite a ways since we initially saw the welcome signs, we assumed that the customs station would be glaringly obvious, and that you wouldn’t even be able to pass it without entering. Wrong. About 15 km after customs, there is a guard station where they check your paperwork to ensure that you passed the inspection. We reached this point, and were politely told that we needed to turn back, go through customs and then return with our stamped paperwork. By the time we had returned, there were guards on the road waving people over, but if you arrive early in the morning, it is very possible to miss the entrance. This happened to another couple we met while in Mendoza, which was a minor condolence. If you are making the drive and you pass the small roadside town of Puente del Inca, you have gone too far.
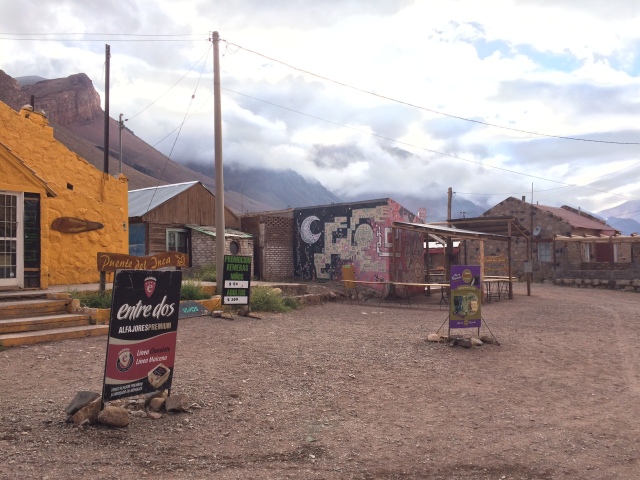
The small roadside town of Puente del Inca. Lots of vendors catering to tourists, and a good place to stop for a bathroom or snack break.
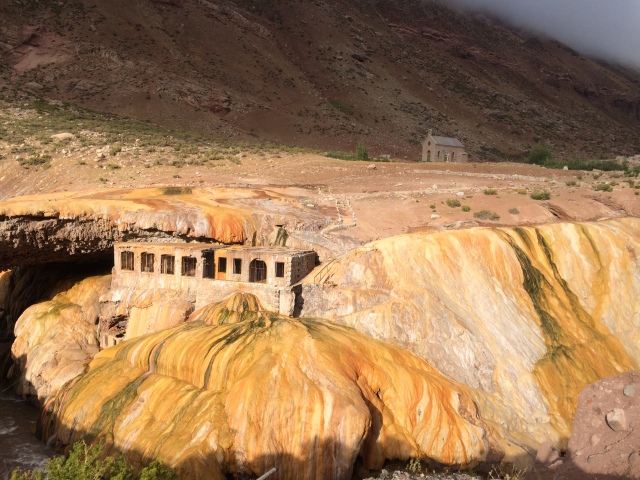
An old hotel, built under a natural bridge in Puente del Inca. Great stop just past the Argentina customs station. If you get here without having gone through customs, TURN AROUND!
Entering Argentina
Of the 2 border crossings, the process for entering Argentina is less thorough, though still time consuming. First, about 15km ahead of the actual customs station, you will come to a booth in the road where you are asked to show proof of insurance and identify how many passengers are in the car. This insurance paperwork is specifically for international travel, and can be purchased for varying durations at most local insurance providers. We purchased ours online at mapfre.cl for about 5,ooo CLP, and printed it ourselves.

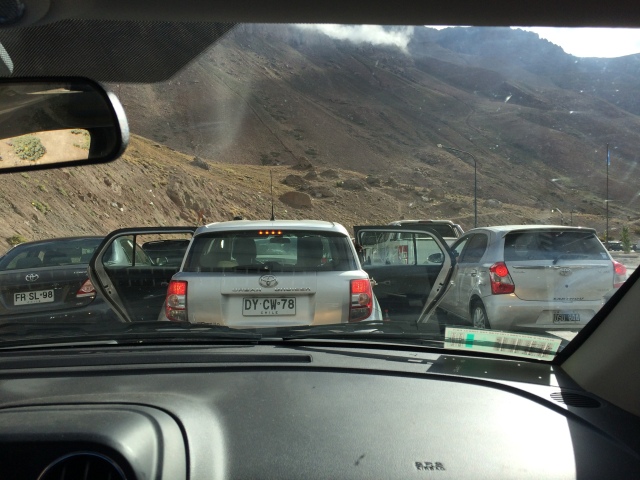
Next, you proceed down the road to customs. Missing the entrance the first time around cost us, and by the time we returned we were placed in a line of cars that was about 15 cars deep and 4 rows wide. The process was slow, with no instructions or advance notice given about what would be required inside. We waited for about an hour and fifteen minutes before finally pulling up to the first booth, where I was asked for a form that I was supposed to have filled out with details about my car. After being pointed to 4 different booths, I finally located the form and returned to the first booth to fill it out and have it stamped along with our passports. Once in hand the paperwork was pretty straight forward. They collected the form, and then asked for the paperwork for our car itself. Here, they checked our Padron, which is a small card that functions similarly to a title in the U.S., and in our case (because we have not yet received a new Padron in my name yet), the paperwork demonstrating that we had officially purchased the car. Basically, they are looking for proof that either you a) own the car or b) have permission from the owner to take it across the boarder. If you are driving a rental car or driving someone else’s vehicle, you need a signed letter that gives this permission, otherwise you will not be allowed to cross the border.
We were not asked to fill out any sort of declarations form, nor was our car searched. We kept waiting for another step or more questions, but after a few stamps on our paperwork and in our passports, we were waived forward. We left with 2 new papers, a small card sized form with 4 stamps that was collected 15 km up the road to prove that we had cleared customs, and a larger form that we were told to keep with us for entrance back into Chile.
**Note – until March 26, 2016 Americans were required to pay a reciprocity fee to enter Argentina. During Barack Obama’s recent visit to Argentina, this fee was eliminated, and thus no longer has to be paid. You will find many blogs staying you need to purchase and print this form in advance, but it is no longer necessary. Unfortunately, we had purchased it in advance (as was required) and essentially lost the money. This kind of unnecessary payment is what our friends here like to call the Gringo tax. Bad news for us, but good news for future travelers into Argentina.
Entering Chile
When we passed the Chilean customs line on our way into Argentina, we were horrified to see cars lined up several kilometers back. Many people were out of their cars, and we were told that wait times were anywhere from 5-8 hours. Fortunately, when we returned on Monday morning, the line was significantly shorter, and we only had about 4 cars ahead of us to be checked. Even still, the process was more thorough than what we experienced in Argentina.
As we pulled up to the customs area, we were waived down a hill and into a holding area where we were given a declarations paper to fill out as we waited. First we came to a booth where they checked our passports as well as the paperwork we were issued when we entered Argentina. After running our passports and entering some other details into a computer, they returned the passports and issued us 2 new tourist cards.
Next, we pulled forward into a short line of cars and waited for our car to be checked. Here, unlike in Argentina, each car is stopped and searched. We were asked a few questions, and then asked to unload all of our bags onto a bench beside the car. The agent instructed us to unzip the bags, and then glanced over each before telling us we could put them back in the car. He also asked us to pop the hood and trunk, and took a look inside.
We had a bag of snacks with us, and heeded the warning to declare any animal or plant products in order to avoid a fee if they were found. We were allowed to keep our trail mix, as it was still in its original packaging that indicated it came from Chile, but the agent confiscated a plum.
All told, the process seemed simultaneously thorough and not thorough. They looked at all of our bags, but didn’t really search any of them. After about 30-45 minutes in total, we were back on the road.
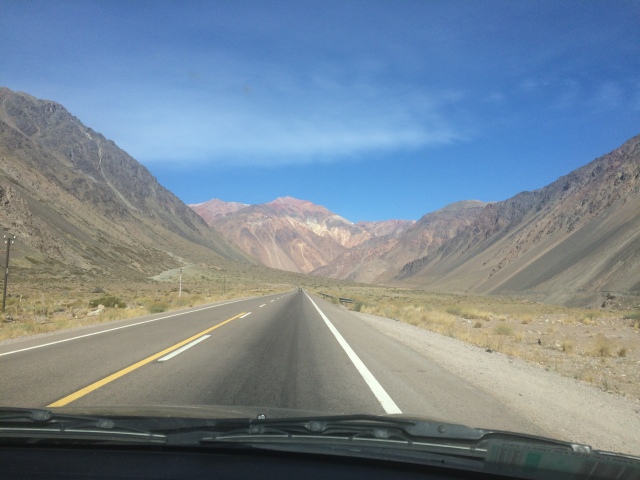
Keep your eyes on the road
For a drive over a mountain range, we actually found the trip pretty smooth and safe. I was prepared to be driving next to cliff sides, and experience a fair bit of carsickness, but happily there was really only one small stretch of road that required concentration and skillful driving. This area is located on the Chilean side of the boarder, and referred to as the “Zona de Curvas”, which is a pretty accurate description of the 28 a curves that take you up the side of a mountain. All in all, though, this stretch was only a minor hassle in a trip full of spectacular views and well paved and maintained roads.


Get out and enjoy the scenery
The drive itself is full of magnificent views, but if you have the time, I would highly recommend pulling of and walking around a little. There are several different trails on either side of the road and in nearby Parque Provincal Aconagua or Parque Provincal Tupungato. After passing through customs, we found a pull off and took a few hours to hike part of the trail to Cerro Penitentes. The trailhead was located roughly between Puente del Inca and Los Penitentes, and made for a great lunch time stop to break up the drive. Read more about the hike here. Another great stopping point is Potrerillos, a dammed lake about an hour outside of Mendoza. We didn’t spend a much time here, but it is definitely worth pulling over to take in the views, and would make a great longer stop, especially during the summer months.
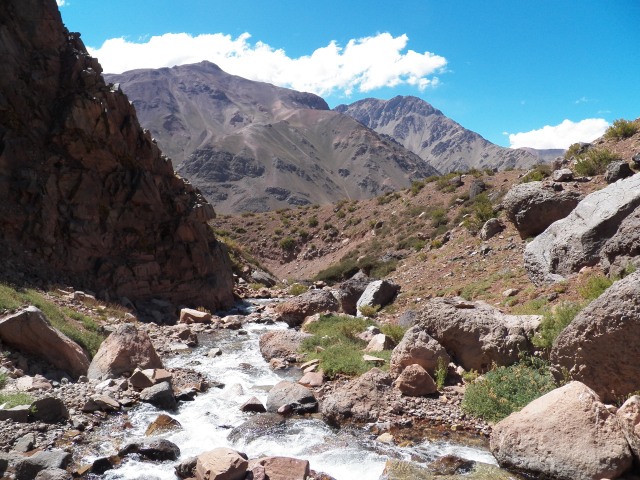
Our hike on the Cerro Penitenties trail took us along the beautiful Rio de Vargas
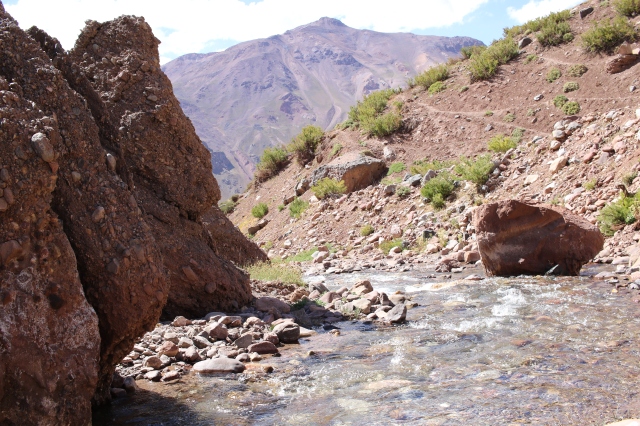
The view from a flat river rock that made for a great picnic table along our hike

Stopping at an overlook to take in the sights at Potrerillos
Overall, I would definitely recommend this drive to anyone considering it. It is beautiful, relatively easy and offers lots of possibilities in the way of stops along the way (whether for a short hike, or a camping trip). Have questions about the drive? Drop me a line in the comments and I’ll do my best to help! Drive safe and enjoy the ride!

Pingback: Day Hike – Cerro Penitentes (Argentina) | Our Daily Balance
Pingback: Easter in Mendoza – Drinking wine and making friends | Our Daily Balance